
Guides / Displays
Monitors, triples or VR? Choose your screens.
Pick the display that fits your room, your PC and the way you actually race.
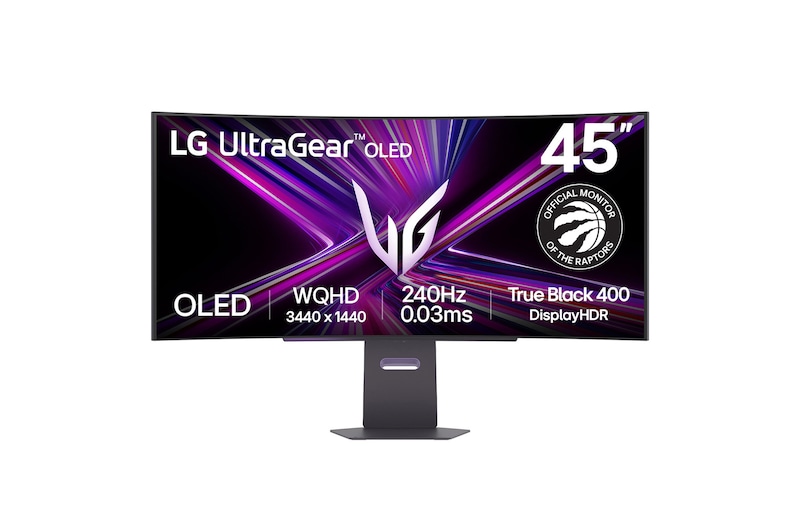
I race on three 45-inch curved OLED ultrawides at 3440 × 1440, driven by a 4090 and a 9800X3D. Before those I ran three 32-inch Samsung Odyssey G7s — 1440p, 240 Hz, VA panels, hard 1000R curve. So I have spent real hours on both of the setups most people are choosing between.
Three things surprised me about that switch, and they are not the three you would expect.
The immersion jumped. Being properly surrounded is what changed — more than anything on the spec sheet.
The extra size mattered far less than I assumed. Going from 32-inch to 45-inch panels was the part I was most excited about and the part that moved the needle least.
The OLED made a real difference. That one lived up to it.
And then the part nobody warned me about: the bigger panels meant modifying my stands and fitting vertical uprights on the outer two monitors. I do not regret the switch for a second. But look at which of those four things was the unplanned job.
The screen is the easy decision. The mount and the seating position are the hard ones.
People spend months choosing between two monitors with nearly identical specs, then discover the stand does not clear their wheelbase, the middle screen sits four inches too high, or the graphics card that ran one 1440p display beautifully now stutters at a full grid start.
Check current brand offers and eligibility →
This is buying and setup guidance, not a fresh benchmark of every product mentioned. My original video is linked at the bottom — read its pricing and product advice in its original context. The linked discount directory contains affiliate links that may earn me a commission.
The short answer
If you do not want the whole article, here is where I would point you.
| If this is you | Buy this | Why |
|---|---|---|
| First proper cockpit, sensible budget | One 32-inch 1440p, 144 Hz+ | Everything works, nothing to align, money left for the wheelbase |
| Want more width without three mounts | 34-inch 3440 × 1440 ultrawide | One cable, one stand, noticeably more peripheral view |
| Committed, have the space and a current high-end GPU | Three matching 1440p screens | The real jump in awareness — and where I would spend next |
| Chasing depth, and you have tried a headset properly | PC VR headset | Genuine 3D depth, at a cost in comfort and convenience |
| Mid-range GPU, or under about 1.6 m of usable width | Do not buy triples yet | You will be disappointed — fix the GPU or the space first |
If you are upgrading one thing and it is not obvious which: go from one screen to three before you go from 1440p to 4K. Width changes how you race. Extra sharpness does not.
The single most common mistake: buying the monitors before checking the stand clears your wheelbase and the GPU can drive them. Do both of those first.
Resolution is a workload, not a sharpness setting
This is the part people get wrong, and it is the one that costs money. A display's job is not measured in inches. It is measured in pixels your graphics card has to draw, sixty to two hundred and forty times a second.
| Layout | Pixels per frame | Versus a single 1440p |
|---|---|---|
| 2560 × 1440 | 3.69 M | 1× |
| 3440 × 1440 ultrawide | 4.95 M | 1.34× |
| 3840 × 2160 (4K) | 8.29 M | 2.25× |
| 5120 × 1440 super-ultrawide | 7.37 M | 2× |
| Three 2560 × 1440 | 11.06 M | 3× |
| Three 3440 × 1440 (my setup) | 14.86 M | 4× |
| Three 3840 × 2160 | 24.88 M | 6.75× |
Read the top and bottom of that table together. Triple 1440p is already a third more work than a single 4K screen. Triple 4K is nearly seven times a single 1440p display. A PC sold to you as "4K ready" tells you nothing about whether it can drive triples.
That 49-inch super-ultrawide is worth a second look too. It is enormous, and it has the pixel count of two 1440p monitors, not three. Check the actual resolution — the diagonal measurement tells you nothing about the rendering cost.
What that means for your graphics card
The number that matters is not what the frame counter says on an empty hot lap. It is what happens at a forty-car green flag, with mirrors on, in the weather you race in. That is the moment a marginal GPU falls apart, and the moment you least want it to.
| Your layout | What to aim for |
|---|---|
| Single 1440p | Comfortable on upper mid-range cards |
| 3440 × 1440 ultrawide | Mid-to-upper range handles it well |
| Three 1080p | Upper mid-range — the budget route to three screens |
| Three 1440p | Current high-end. Below roughly an RTX 4070 class, expect trouble at full grids |
| Three 4K | Flagship, and you will still be turning settings down |
Two things worth knowing beyond that.
Above roughly a 4090, you stop being limited by the graphics card and start being limited by the processor. My own rig is a good example: on a busy start, the 9800X3D is doing more to hold the frame rate together than the 4090 is. If you are spending big, do not put it all in the GPU.
And if your card is below that 4070 class, triple 1440p will fight you exactly when it matters most — a packed first lap. Triple 1080p is 6.22 M pixels against 11.06 M, and that is a legitimate way to get three screens working properly on a real budget. Three screens running well beats three screens stuttering.
Assetto Corsa Competizione is the harshest of the mainstream sims on hardware. If that is your main game rather than iRacing, assume you need a tier more GPU than these figures suggest for the same experience.
I have not bench-tested every card on this list, and I am not going to pretend otherwise. The pixel counts above are arithmetic and exact; the GPU guidance is the shape of the problem, not a promise about your machine. Your settings, mirror count, weather and grid size all move it. Test the races you actually drive before you decide the hardware is the problem.
Minimum and recommended specs: iRacing system requirements ↗
One screen, done properly
There is nothing wrong with a single monitor. A well-positioned 32-inch 1440p screen close to your face beats three badly-mounted panels three feet away, and it costs a third as much.
Get the position right and it does most of what you need. Sit close. A large screen far away fills less of your vision than a smaller one nearby — measure the distance from your eyes before you judge a size.
Aim for 1440p at 144 Hz or better, with variable refresh that actually works on your card. Higher refresh only helps if the PC delivers frames consistently; a 240 Hz panel fed 70 unstable frames looks worse than a 120 Hz panel fed 110 steady ones.
Worth saying plainly, because I own the expensive version of this problem: my three 45-inch panels are 240 Hz, and I cap iRacing at 120. I find that more than enough. Refresh rate your PC cannot hold steady is headroom you paid for and will never see.
And there is a second reason I sit at 120. My panels are 240 Hz, but I also run them at 8-bit colour, because a 10-bit configuration has not been stable for me. I am not certain of the cause, and I am not blaming the monitors — but the bandwidth arithmetic points somewhere obvious.
A 3440 × 1440 screen at 240 Hz needs roughly 29 Gbps of link bandwidth at 8-bit, and about 37 Gbps at 10-bit. A DisplayPort 1.4a output — which is what my 4090 has — carries around 26 Gbps. Both numbers are bigger than the pipe, so compression is doing the work on all three cables at once, and 10-bit asks for a quarter more on top.
If you are buying three high-refresh panels and expecting to run them at their full refresh rate in 10-bit, check your graphics card’s display outputs before you order the screens. The RTX 50 series moved to DisplayPort 2.1b, which roughly triples the available bandwidth; the 40 series did not. For most people that difference is irrelevant. For triples it may be the most relevant thing about the card. I cover it in more detail in the PC guide.
Ultrawides
A 34-inch 3440 × 1440 is the sensible middle ground: meaningfully wider view, one stand, one cable, no alignment. For a lot of people this is the right answer and they talk themselves out of it because triples look better in photos.
The 49-inch super-ultrawides are a different proposition. Very wide, and heavy enough that a lot of desk mounts will not hold one properly. Check the weight rating, not just the VESA pattern.
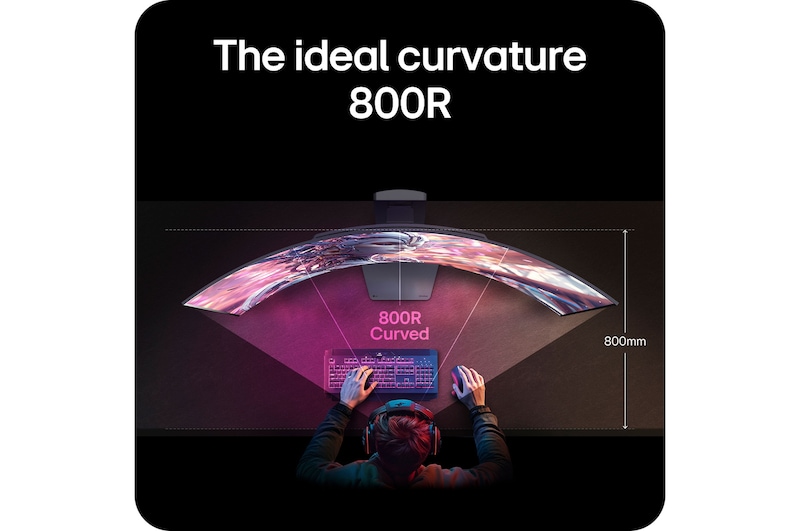
Curvature is a preference, not a feature. It brings the edges of a wide screen closer to a constant viewing distance from your eyes, which genuinely helps at these widths — my own panels are curved and I would not go back to flat at 45 inches. But it adds no resolution and it does not fix your sim's projection. Check whether your game has a curved-screen setting and use it.
On console: do not assume anything. Ultrawide and triple support varies by console, by game, and by title update. Confirm your specific combination before you buy.
Triples: the mount matters more than the monitors
This is where I would spend the upgrade money, and it is where I see the most expensive mistakes.
Three screens give you something a single wide screen cannot: cars alongside you, apexes in your peripheral vision, and your wheel and button boxes still in frame. Once you have raced with it, racing without it feels like driving through a letterbox.
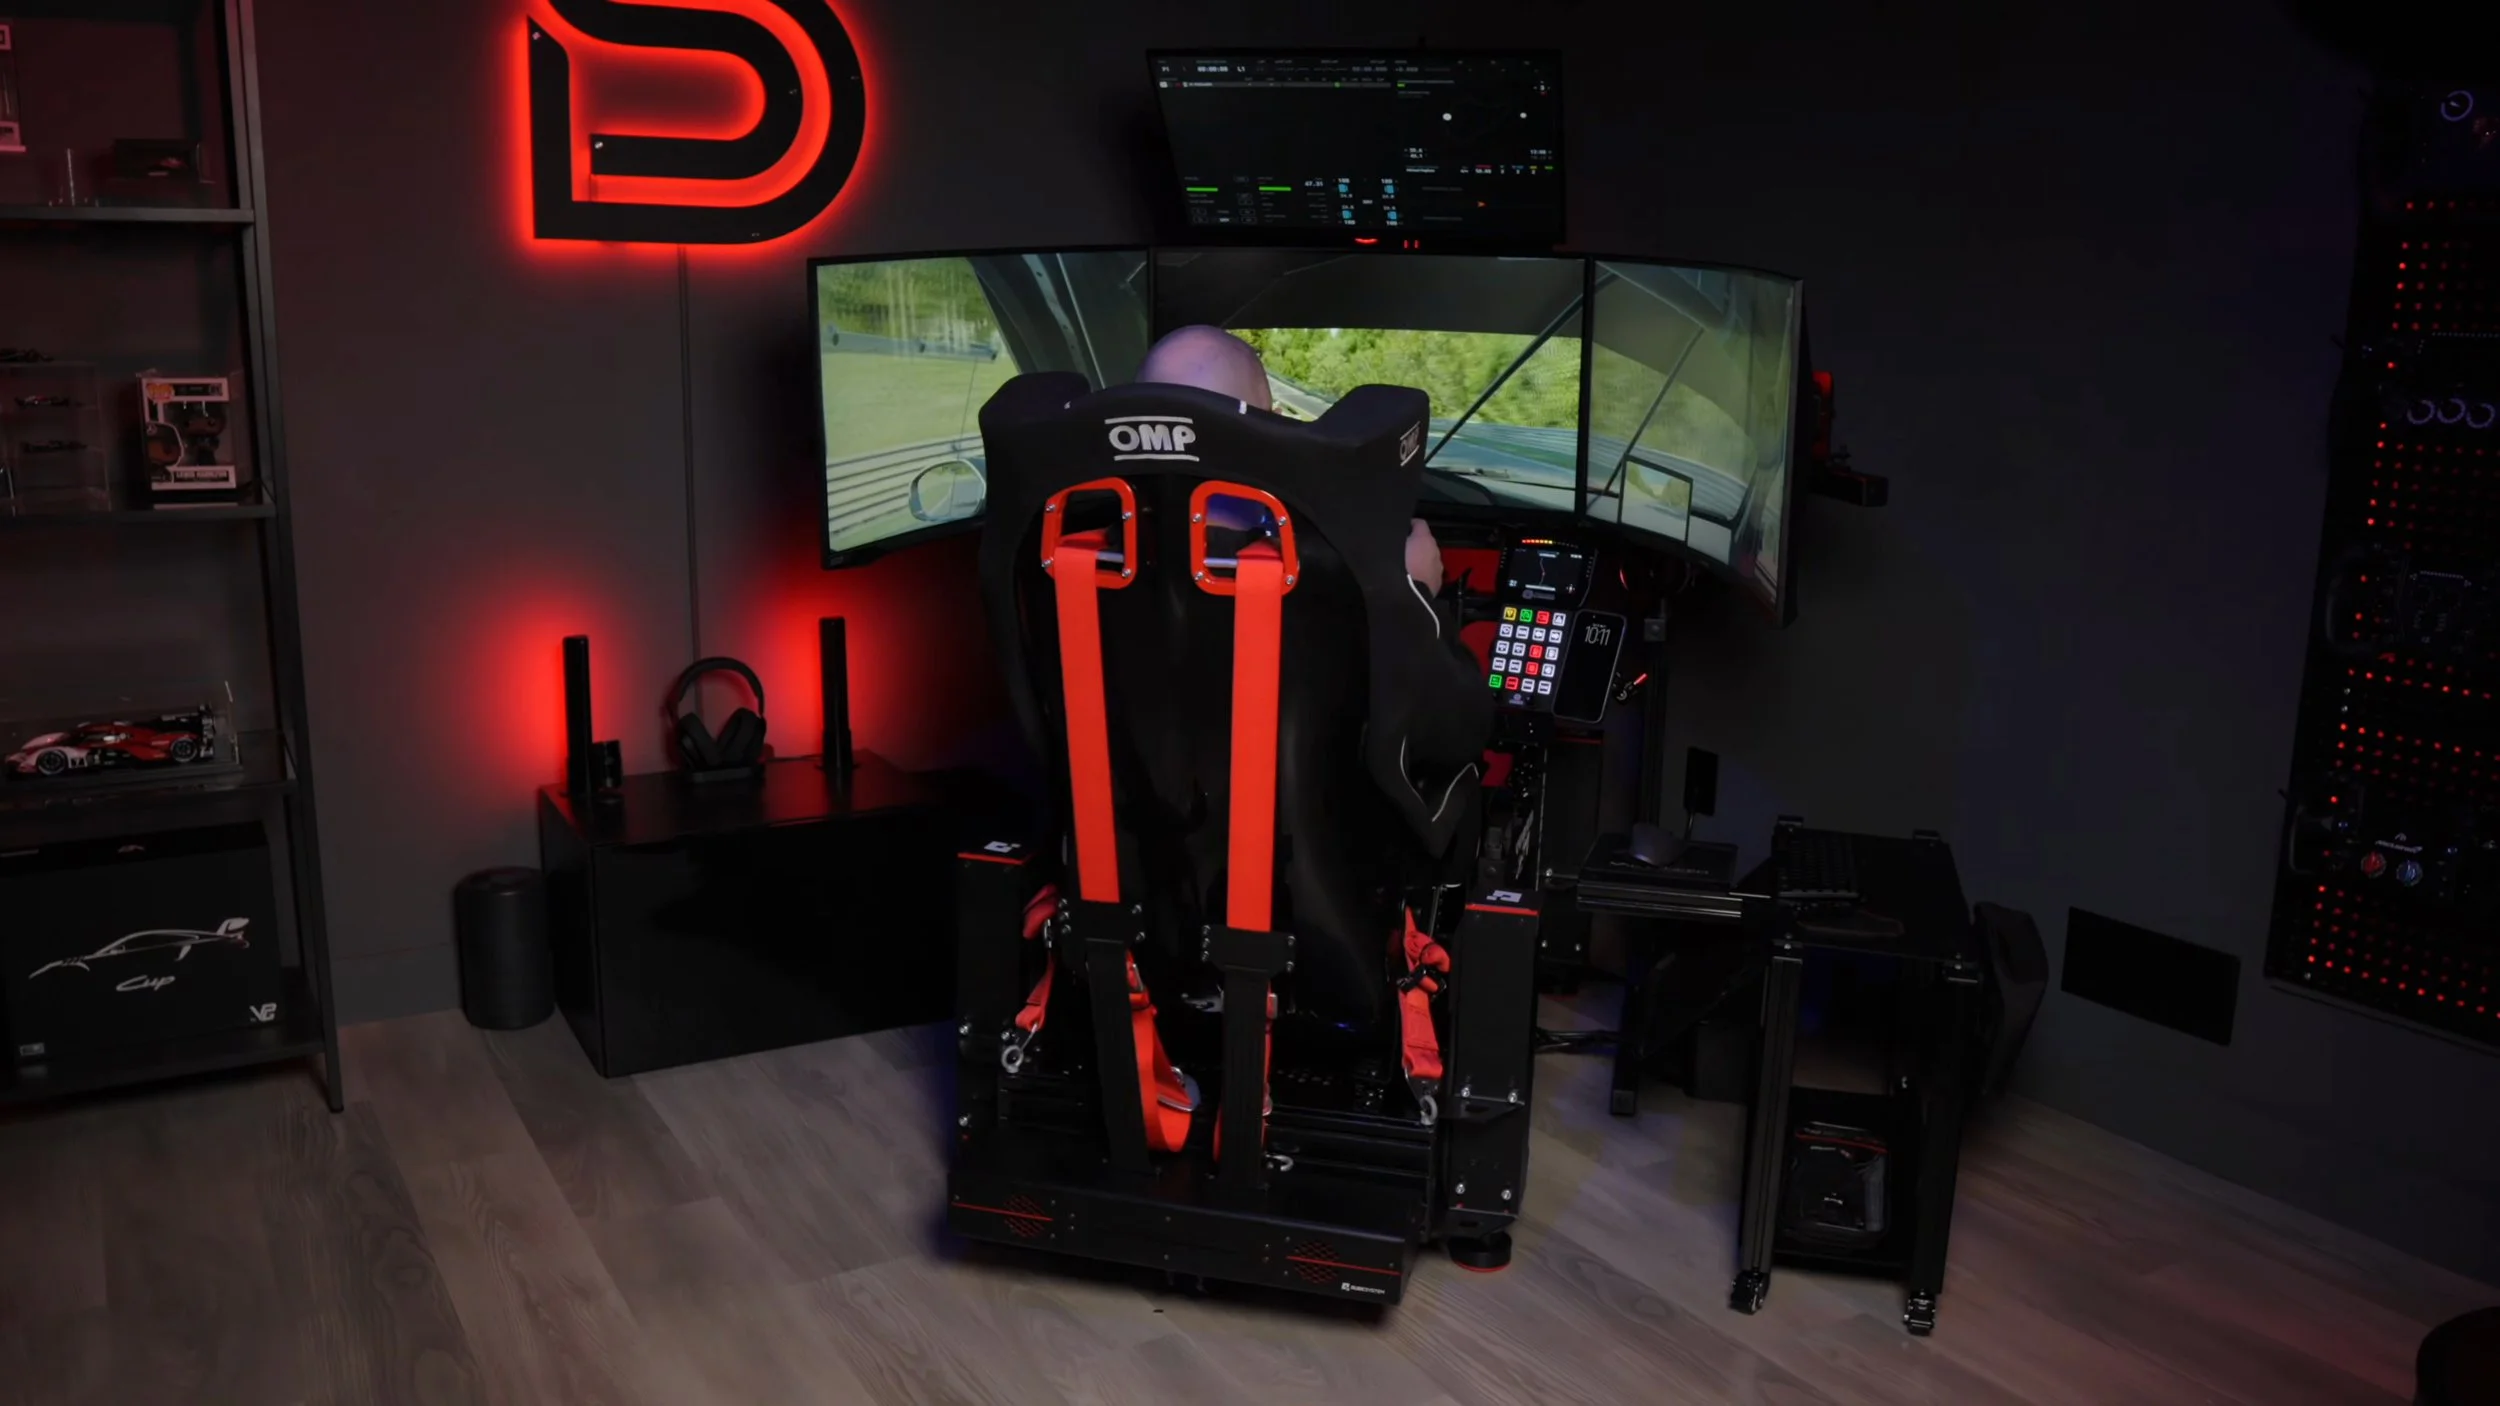
But the monitors are the part you will agonise over least once you own them. The mount is what you will live with.
Buy the stand first, or at least alongside
A freestanding triple stand needs to clear your wheelbase, hold three panels at the correct height, and let you set the side angles independently. Desk mounts rarely manage all three, and almost never with 45-inch screens.
Measure your space before anything else. Three 27-inch 16:9 panels are about 1.8 m laid flat, roughly 1.6 m once you angle the outers in by 30 degrees. Go up to 32-inch and you are at 1.9 m even angled. If your room cannot give you that, the decision has been made for you.
Budget for the stand, the adjustment brackets and three display cables of the right type and length. People routinely forget the cables and discover on setup night that the box included one.
I use Advanced Sim Racing stands, and the reason is simple: they are rock solid and the build quality is there. With three 45-inch panels hanging off a mount, rigidity is not a nice-to-have — any flex or wobble shows up as movement in your peripheral vision every time the rig moves or you brake hard. A stand that feels "good enough" in a showroom is a different thing under three large screens for two hours.
Code: SRD5 — 5% off selected Advanced Sim Racing products
Affiliate link — I may earn a commission at no extra cost to you. Exclusions apply; eligibility is confirmed at checkout. I bought into their stands because they work, not the other way round.
Even then, expect the mount to need work. Moving from 32-inch panels to 45-inch ones meant modifying my stands and adding vertical uprights on the outer two monitors. That was not in my plan and it was not in my budget. If you are stepping up a screen size on a mount you already own, assume you will be buying or making something to support it — and find that out before the monitors arrive, not after.
If you run motion, check clearance through the entire range of travel, not at rest. And follow the mount manufacturer's guidance — a rig that moves with three screens bolted to it is not a place to improvise.
Set the seat before the screens
The order that works:
- Set your seat and wheel position first, where you would actually race.
- Centre the middle monitor on your seated eye line.
- Match the panel heights across all three.
- Set the side angles last.
- Check clearance for your hands, full wheel rotation, and climbing in and out.
Doing it the other way round — mounting the screens, then trying to fit yourself to them — is how you end up with a middle screen too high and a permanent neck ache.
Use real triple projection
This one is free and most people skip it. Stretching a single camera across three screens distorts the outer two badly — the car looks wrong in your peripheral vision and your sense of speed goes with it.
In iRacing, enter your measured monitor width, bezel width and eye distance, then let it calculate the field of view and set up the three projections properly. It takes ten minutes and it is the difference between triples looking right and triples looking like a fairground mirror.
Step by step: iRacing's triple-screen setup guide ↗
Check your outputs before you buy
Graphics cards have limits on simultaneous displays and on which resolution-and-refresh combinations each output can carry. Three high-refresh panels plus a dash screen plus a VR headset is more than some cards will do at once. Matching connector shapes proves nothing — check the card's actual specification for the combination you intend to run.
Panels: ignore the "1 ms" sticker
That number on the box is chosen by the manufacturer from whichever transition flatters the panel most. It tells you almost nothing.
Three different things get confused here. Refresh rate is how often the screen updates. Pixel response is how quickly a pixel changes colour. Input lag is the delay between your wheel moving and the picture reacting. A panel can be good at one and poor at another.
What is worth reading instead: measured motion performance for the exact model, how it behaves in dark transitions, and whether it overshoots.
| Panel type | Strength | The catch |
|---|---|---|
| IPS | Consistent colour at an angle — matters across three screens | Weaker blacks, sometimes visible glow |
| VA | Strong contrast, deep blacks | Dark-motion smearing varies a lot by model |
| OLED | Best blacks, near-instant pixel transitions | Static elements, panel care, check the burn-in warranty |
Mini-LED is not a fourth option. It is a backlight behind an LCD panel — usually VA or IPS — that improves contrast. Useful, but it does not change what the panel underneath is.
IPS deserves particular thought for triples specifically. You view the side screens at an angle by definition, and that is exactly where IPS earns its keep.
I have run triples on both VA and OLED — three Odyssey G7s before the LGs I use now. Both were 240 Hz and both were curved, so panel technology was the real variable rather than size or refresh. The OLED made a genuine difference to me. The jump in screen size, which I had been far more excited about, did not.
On OLED and burn-in, honestly
I do not run HUD overlays, so I am not the person to tell you what three years of a permanently-parked delta bar does to a panel. I would rather say that than pretend otherwise.
What I can tell you is that this is a much smaller worry than it was. Modern OLED monitors ship with mitigation built in — on mine, the on-screen menu carries OLED brightness control and dedicated afterimage protection settings, and they are on by default. Leave them on.
The more important point is the warranty. LG covers burn-in on its UltraGear OLED monitors, and after some public pressure it confirmed that normal residential use — gaming and desktop work, static interface elements included — counts as covered use. In the US that is a two-year term; terms vary by region, so check yours before you buy rather than assuming.
So: if you run a permanent HUD, take it seriously, keep the protection settings on, and buy from a brand that puts burn-in coverage in writing. Do not let it scare you off OLED entirely — just do not ignore it either.
HDR
Do not buy on the peak brightness figure, and do not assume a screen that accepts an HDR signal does anything useful with it. Contrast, local dimming zones, colour volume and the game's own implementation all decide the result.
VESA's DisplayHDR and DisplayHDR True Black tiers assess several characteristics at once — luminance, colour gamut, contrast, black level and colour accuracy — with separate scales for LCD and emissive panels. That is a more honest starting point than a brightness number on a box.
Certification tiers: VESA DisplayHDR ↗
Before you order, check the manual for what input, cable and settings the panel needs at your intended resolution, refresh rate and colour depth. Then check that adaptive sync is supported for your exact GPU-and-monitor combination in multi-monitor use — which is not always the same as single-monitor use.
VR: real depth, real compromises
VR gives you something no monitor can — genuine stereoscopic depth, and the ability to turn your head and look into an apex or at the car beside you. For judging braking points and spatial awareness, nothing else comes close.
It also puts a screen between you and every physical control you own.
I have raced in VR, and I will be straight about where I landed: it is a genuinely incredible experience and enormous fun — but it never became my go-to, and it is not what I have stuck with long term. That is my preference, not a verdict. Plenty of people try it and never go back to screens.
Which is exactly why I would say this: try a headset for more than ten minutes before you buy one. A demo that feels extraordinary can become a headset you stop reaching for by week three — or the thing that ruins monitors for you forever. You will not know which until you have done a few full race distances. Things that decide it:
- Comfort across a full race distance, not a hot lap
- Lens clarity where you are actually looking, not just dead centre
- Whether you wear glasses, and whether prescription inserts exist
- Heat and ventilation over an hour
- Finding your button box, keyboard and drink without seeing them
- Cable routing, or battery life if you go wireless
Check the PC side properly
A standalone headset does not mean your PC sim runs on it. Meta supports PC Link workflows for Quest 3 and 3S among others, over USB-C and on Windows — but the PC, the connection and the software requirements all still apply.
Verify the simulator, the runtime and the connection method together — USB, wireless streaming and direct display connections have genuinely different requirements. And keep render resolution and refresh realistic: stable frame delivery matters far more in a headset than a big supersampling number. Dropped frames on a monitor are annoying. Dropped frames in VR make you ill.
Connection requirements: Meta Link compatibility ↗
One clear warning
Do not buy a Windows Mixed Reality headset in 2026. That includes the HP Reverb family, which still shows up secondhand at tempting prices.
Microsoft removed WMR from Windows 11 in the 24H2 update — those headsets simply stopped working for anyone who updated. The remaining Steam support, and only if you stay on 23H2 and never update, ends in November 2026. That is about two months from now. Whatever the secondhand price looks like, you would be buying a device with a published expiry date that has nearly passed.
Official notice: Microsoft on WMR support ↗
Setup checklist
Work through these in order. Most of the "my triples look wrong" problems are one of these skipped.
- Seat, wheel and pedals positioned first — before anything is mounted
- Screens mounted and aligned to your seated eye line
- Resolution and refresh rate set in Windows, then confirmed inside the sim
- Eye distance and screen dimensions measured — actually measured, with a tape
- Field of view calculated using the correct horizontal or vertical setting for your sim
- Triple projection configured, or the VR runtime verified
- A full-grid race tested, not a hot lap — reduce expensive effects until frame delivery holds
- Mirrors readable and physical controls reachable before you commit to a long event
Pick the setup you will enjoy using every day. Singles keep it simple. Ultrawides cut the mounting problem in half. Triples give you awareness. VR gives you depth. None of them is wrong — but the one that stays set up and ready is the one that makes you faster.
Watch the original guide
The video covers the same ground with the rig in front of me. It went up in May 2023, so treat the specific products and prices in it as a snapshot of that moment — the written guidance above is where the current compatibility and buying advice lives.
Planning a triple setup?
Check the discount directory before you order. A brand appearing there does not mean every product carries a discount — codes, affiliate-only links and restrictions are listed per brand.
Keep planning
- So you want to start sim racing? → — if this is your first setup, start here.
- My setup → — the full parts list for the rig in this article.
- All reviews → — hardware I have actually tested.